As an interior designer, I’ve seen trends come and go. But one trend that has stood the test of time and continues to captivate homeowners is the use of reclaimed wood in home decor.
There’s something magical about bringing a piece of history into your living space, knowing that the wood beneath your fingertips once stood as a majestic tree or perhaps even formed part of a centuries-old barn.
In this comprehensive guide, I’ll walk you through everything you need to know about incorporating reclaimed wood into your home, from sourcing and preparation to creative applications and maintenance. Whether you’re a DIY enthusiast or simply looking to add a touch of rustic charm to your space, this article will inspire you to embrace the beauty of reclaimed wood.
The Allure of Reclaimed Wood: A Brief History
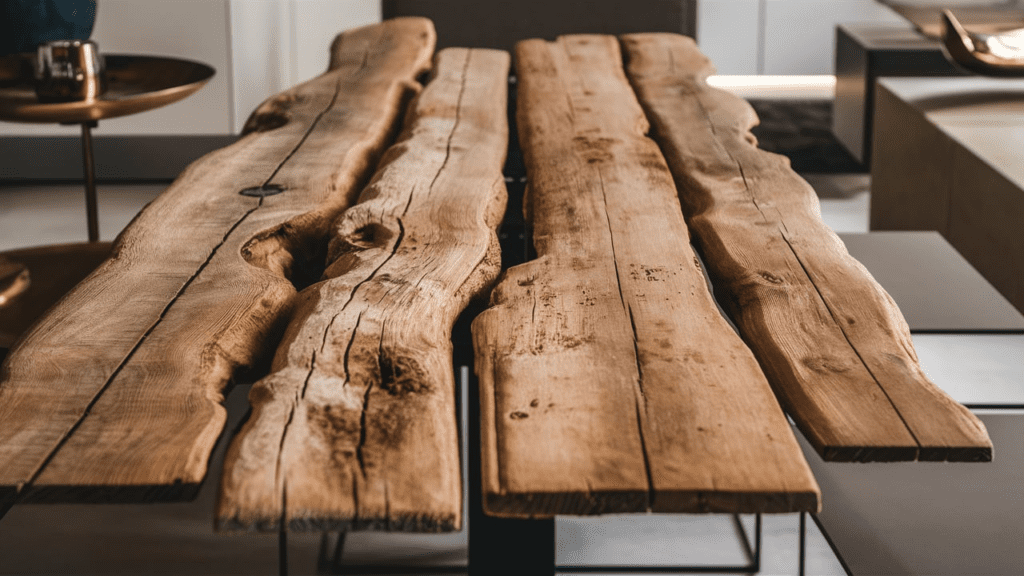
Before we dive into the practical aspects, let’s take a moment to appreciate the rich history of reclaimed wood. As a designer, I’m often drawn to materials that tell a story, and reclaimed wood certainly fits the bill.
Reclaimed wood has been used for centuries, with early examples dating back to medieval times when timber from old ships was repurposed for building construction. In more recent history, the use of reclaimed wood gained popularity during the 1980s as environmental awareness grew and people began to recognize the value of preserving old-growth forests.
Today, reclaimed wood comes from various sources, including:
- Old barns and farmhouses
- Industrial buildings and warehouses
- Deconstructed ships and boats
- Railway ties and telegraph poles
- Wine barrels and whiskey casks
Each piece of reclaimed wood carries with it a unique history, adding character and depth to your home that simply can’t be replicated with new materials.
Is reclaimed wood more environmentally friendly than new wood?
Yes, using reclaimed wood is generally more environmentally friendly than new wood. It reduces the demand for newly harvested timber, helps preserve forests, and keeps usable materials out of landfills. Additionally, reclaimed wood often comes from old-growth trees, which are no longer readily available, making it a sustainable choice for eco-conscious homeowners.
Sourcing Reclaimed Wood: Where to Find Hidden Treasures?


One of the most exciting aspects of working with reclaimed wood is the thrill of the hunt. As a designer, I love nothing more than exploring salvage yards and architectural salvage stores, searching for that perfect piece to complete a client’s vision. Here are some of my favorite places to source reclaimed wood:
- Local Salvage Yards and Architectural Salvage Stores: These are goldmines for unique pieces of reclaimed wood. I once found a set of beautiful oak beams from a 19th-century barn that became the centerpiece of a client’s rustic kitchen renovation. Don’t be afraid to get your hands dirty and dig through piles – you never know what treasures you might uncover.
- Online Marketplaces: Websites like Etsy, eBay, and specialized reclaimed wood marketplaces offer a wide variety of options. I’ve had great success finding specific types of wood or pre-cut pieces for smaller projects through these platforms. Just be sure to carefully review the seller’s description and ask questions about the wood’s origin and condition before purchasing.
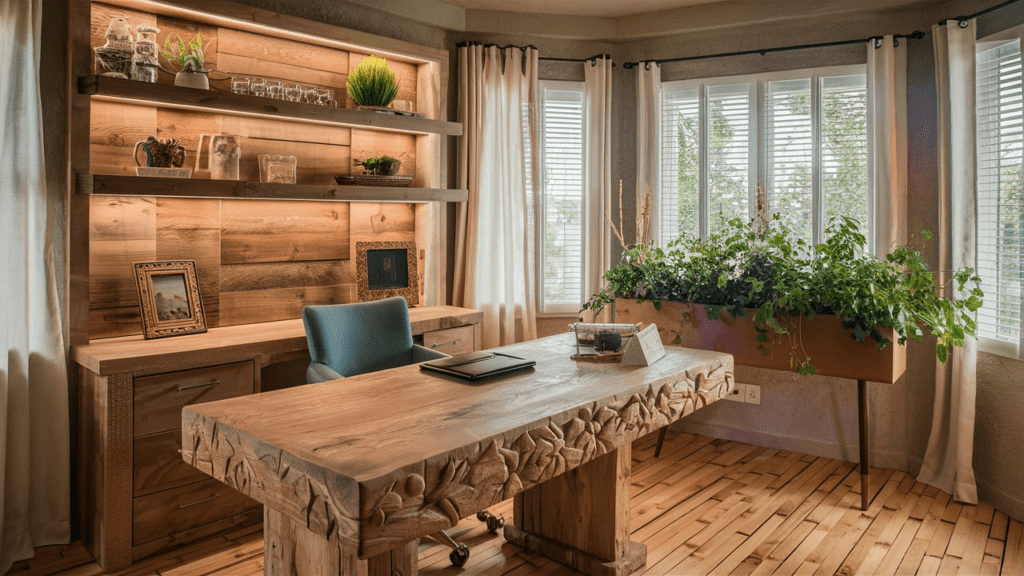
- DIY Salvaging: For the adventurous souls out there, salvaging your own wood can be a rewarding experience. I once helped a client transform their family’s old tobacco barn into stunning wall paneling for their home office. However, it’s crucial to follow proper procedures and obtain necessary permissions before salvaging wood from old structures.
Do’s and Dont’s to Consider While Sourcing Reclaimed Wood
Dos:
- Always get permission from the property owner
- Wear appropriate safety gear (gloves, goggles, sturdy boots)
- Check for nails, screws, and other metal objects before cutting or removing wood
- Be respectful of the structure and its surroundings
Don’ts:
- Don’t trespass on private property
- Avoid removing wood from historically significant buildings without proper authorization
- Don’t take more than you need or can safely transport
- Never compromise your safety or the structural integrity of a building
How can I tell if the wood is truly reclaimed?
Authentic reclaimed wood often has distinctive characteristics:
- Visible signs of wear, such as nail holes, knots, and weathering
- Inconsistent coloring or patina
- Varied grain patterns and textures
- Markings from old joinery or hardware
- Documentation of its origin (for reputable sellers)
If you’re unsure, don’t hesitate to ask the seller for more information about the wood’s history and source.
Preparing Reclaimed Wood: From Rough to Ready
Once you’ve sourced your reclaimed wood, it’s time to prepare it for use in your home. This step is crucial for ensuring the wood is safe, clean, and ready for its new life as part of your decor.


1. Cleaning and Sanitizing
Start by giving your reclaimed wood a thorough cleaning. I typically begin with a soft-bristled brush to remove loose dirt and debris. For tougher grime, a mixture of warm water and mild dish soap works wonders. For more stubborn stains or to kill potential mold spores, I use a solution of one part white vinegar to four parts water.
Pro tip: Always test your cleaning solution on a small, inconspicuous area first to ensure it doesn’t damage the wood or affect its color.
2. Removing Nails and Hardware
This can be a time-consuming process, but it’s essential for safety and to prepare the wood for its new use. I use a combination of pliers, a nail puller, and sometimes a metal detector to locate hidden nails or screws. Be sure to wear protective gloves and eyewear during this step.
3. Treating for Insects and Mold
To ensure your reclaimed wood is free from unwanted guests, it’s important to treat it for insects and mold. For insect treatment, I recommend using a borate solution, which is effective against a wide range of wood-boring insects. For mold, a mixture of water and borax can be applied to kill existing spores and prevent future growth.
Once your wood is clean, de-nailed, and treated, allow it to acclimate to your home’s temperature and humidity for at least a week before using it in your project. This will help prevent warping or cracking once it’s installed.
Do I need to sand reclaimed wood before using it?
It depends on your desired outcome and the wood’s current condition. If you want to preserve the wood’s weathered look, minimal sanding may be necessary. However, if you’re aiming for a smoother finish or plan to apply a new stain or paint, you’ll want to sand the wood thoroughly. Start with a coarse-grit sandpaper (60-80 grit) and work your way up to a finer grit (120-220) for a smooth finish.
Popular Reclaimed Wood Projects: Bringing History Home
Now that your reclaimed wood is prepped and ready, let’s explore some popular ways to incorporate it into your home decor. As a designer, I’ve found that these projects never fail to add warmth, character, and a sense of history to a space.

1. Accent Walls
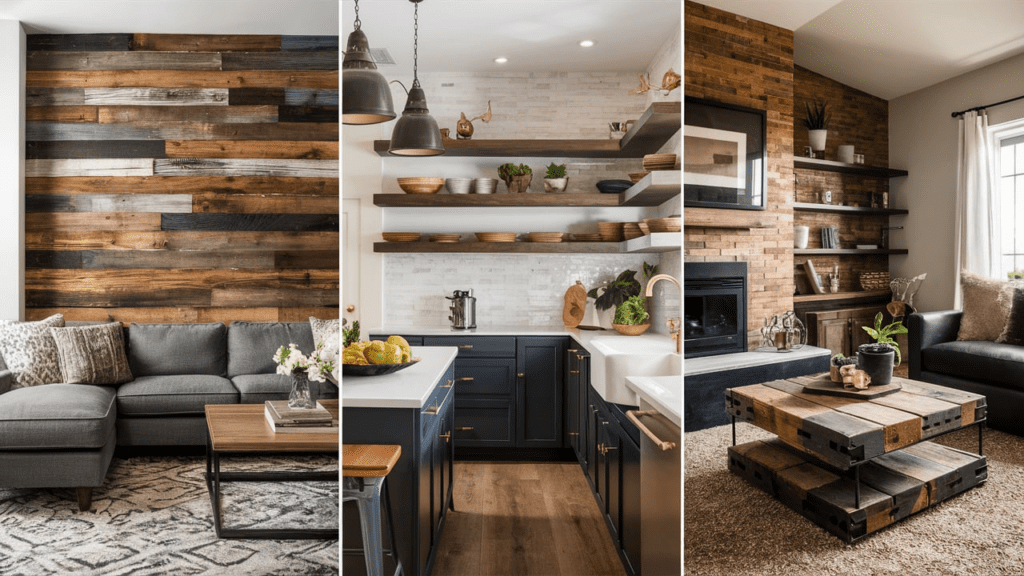
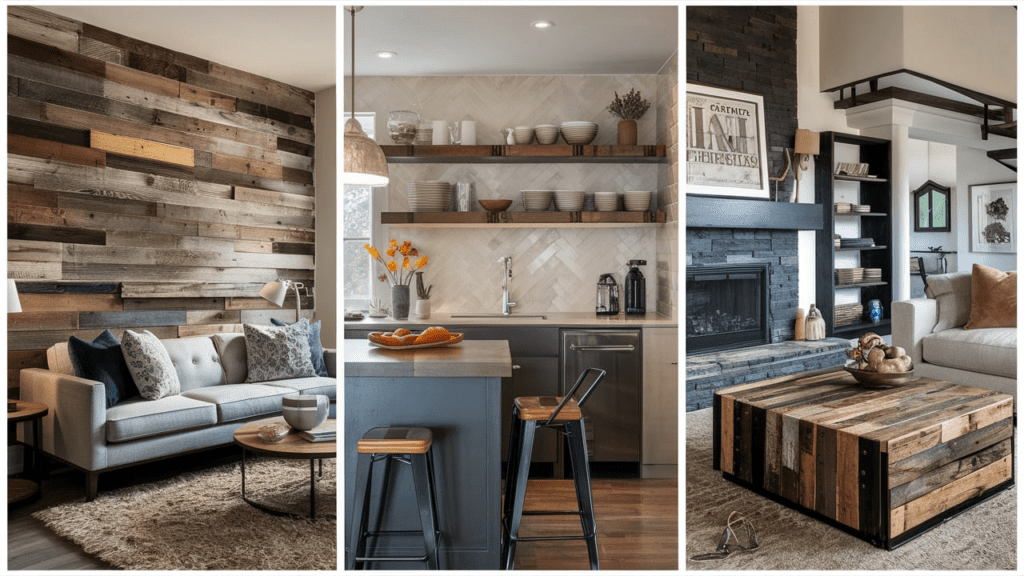
One of my favorite ways to make a statement with reclaimed wood is by creating an accent wall. I recently completed a project where we used weathered barn wood to create a stunning focal point in a client’s living room. The varied tones and textures of the wood added depth and interest to the space, instantly transforming it from ordinary to extraordinary.
To create a reclaimed wood accent wall:
- Measure your wall and calculate the square footage needed
- Clean and prepare your reclaimed wood planks
- Start at the bottom and work your way up, using a level to ensure straight lines
- Vary the lengths and colors of the planks for a more natural look
- Use a nail gun or wood adhesive to secure the planks to the wall
2. Floating Shelves
Reclaimed wood floating shelves are not only functional but also serve as beautiful decorative elements. I love using thick, chunky pieces of reclaimed wood for shelving – they add a sense of solidity and history to a room.
For a recent kitchen renovation, we created floating shelves from reclaimed pine that had once been part of a warehouse floor. The rich patina of the wood contrasted beautifully with the crisp white subway tiles, adding warmth and character to the space.
To create reclaimed wood floating shelves:
- Cut your reclaimed wood to size
- Sand and finish as desired
- Install heavy-duty floating shelf brackets
- Secure the wood to the brackets, ensuring it’s level
3. Furniture Pieces
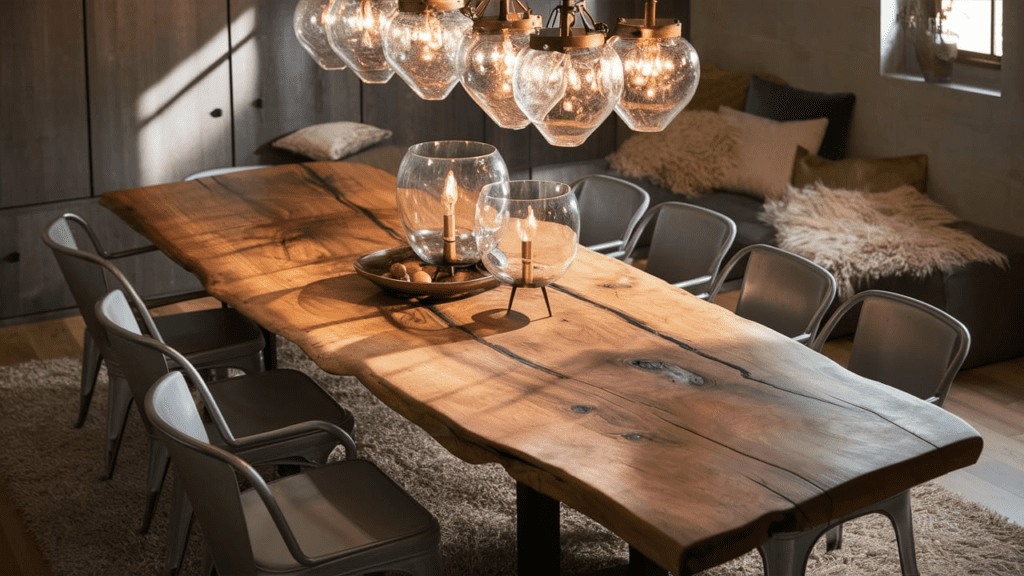
Reclaimed wood is perfect for creating one-of-a-kind furniture pieces. From dining tables to coffee tables, benches to headboards, the possibilities are endless. One of my most memorable projects involved creating a custom dining table from reclaimed oak barn beams. The table became the heart of the client’s home, with each dinner guest marveling at its beauty and imagining the stories it could tell.
When designing furniture with reclaimed wood, consider:
- The wood’s natural characteristics and how they can be highlighted
- Combining reclaimed wood with other materials for contrast (e.g., metal legs on a wooden table top)
- The intended use of the piece and how it will wear over time
- Proper sealing and finishing to protect the wood and make it practical for everyday use
Can reclaimed wood be used in high-moisture areas like bathrooms?
Yes, reclaimed wood can be used in bathrooms and other high-moisture areas, but it requires proper preparation and sealing. Choose a water-resistant wood species like cedar or teak, and apply multiple coats of a marine-grade sealant to protect the wood from moisture. Regular maintenance and resealing may be necessary to ensure the wood’s longevity in these environments.
Unexpected Ways to Incorporate Reclaimed Wood: Think Outside the Box
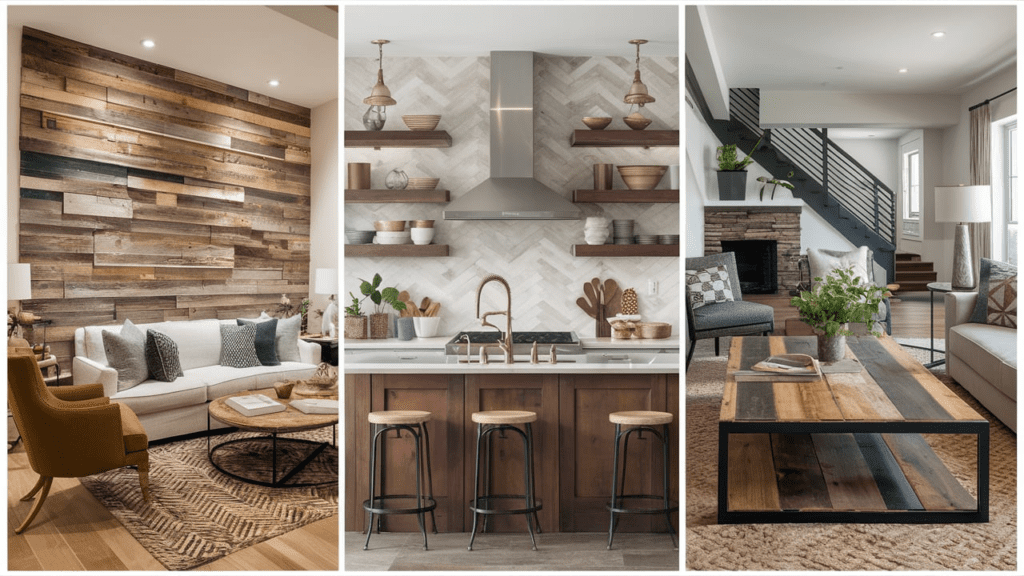

As a designer, I’m always looking for innovative ways to use materials and reclaimed wood offers endless possibilities for creative expression. Here are some unexpected applications that can add a unique touch to your home:
1. Ceiling Beams
Reclaimed wood beams can transform a plain ceiling into an architectural masterpiece. In a recent project, we used weathered oak beams to create a coffered ceiling in a client’s study. The result was a warm, inviting space that felt like stepping into a centuries-old library.
To install reclaimed wood ceiling beams:
- Determine the layout and mark beam positions on the ceiling
- Install blocking between joists for additional support
- Secure metal brackets or cleats to the ceiling joists
- Lift and attach the reclaimed beams to the brackets
- Add any decorative elements or trim as desired
2. Kitchen Backsplashes
For a truly unique kitchen, consider using reclaimed wood as a backsplash. I recently designed a rustic-modern kitchen where we used reclaimed wood planks as the backsplash behind the range. The wood was sealed with a food-safe finish to protect it from moisture and cooking splatters, creating a stunning focal point that tied the whole space together.
Steps for a reclaimed wood backsplash:
- Clean and prepare the wood, ensuring it’s smooth and splinter-free
- Cut planks to size, creating interesting patterns if desired
- Apply a waterproof adhesive to secure the wood to the wall
- Seal the wood thoroughly with a food-safe, waterproof sealant
- Consider adding a clear glass panel over high-splash areas for extra protection
3. Bathroom Vanities
Reclaimed wood can add warmth and character to a bathroom, especially when used to create a custom vanity. In a recent spa-inspired bathroom renovation, we transformed a piece of reclaimed barn wood into a floating vanity. The contrast between the rustic wood and sleek modern fixtures created a stunning, one-of-a-kind look.
Creating a reclaimed wood bathroom vanity:
- Select a suitable piece of reclaimed wood and cut to size
- Sand and finish the wood, paying extra attention to smoothness
- Apply multiple coats of a water-resistant sealant
- Install a drop-in or vessel sink
- Mount the vanity securely to the wall, ensuring proper support
How do I prevent reclaimed wood from splintering?
To prevent splintering, follow these steps:
- Sand the wood thoroughly, starting with coarse-grit sandpaper and progressing to finer grits
- Use a tack cloth to remove all dust after sanding
- Apply a wood conditioner before staining or sealing
- Choose a high-quality sealant and apply multiple thin coats
- Regularly maintain the wood with appropriate cleaning and re-sealing as needed
Mixing Reclaimed Wood with Other Materials: Creating Harmony in Contrast

One of the most exciting aspects of working with reclaimed wood is its versatility in pairing with other materials. As a designer, I love creating unexpected combinations that bring out the best in each element. Here are some of my favorite ways to mix reclaimed wood with other materials:
1. Pairing with Metal for an Industrial Look
The combination of rugged reclaimed wood and sleek metal creates a perfect industrial-chic aesthetic. In a recent loft renovation, we paired reclaimed wood flooring with black steel-framed windows and exposed ductwork. The result was a space that felt both raw and refined, with the warmth of the wood softening the industrial elements.
Ideas for wood and metal pairings:
- Reclaimed wood dining table with metal hairpin legs
- Industrial-style shelving units with metal frames and reclaimed wood shelves
- Barn door hardware on a reclaimed wood sliding door
2. Combining with Glass for a Modern Touch
The juxtaposition of weathered wood and crisp, clean glass can create a stunning visual impact. I recently designed a home office where we used a large piece of reclaimed wood as a desktop, paired with a glass partition wall. The transparency of the glass allowed the beauty of the wood to shine through, while also creating a sense of openness in the space.
Wood and glass combination ideas:
- Reclaimed wood coffee table with a glass top
- Glass-fronted cabinets with reclaimed wood frames
- Reclaimed wood headboard with glass pendant lights
3. Contrasting with Concrete for a Contemporary Feel
The organic texture of reclaimed wood pairs beautifully with the cool, smooth surface of concrete. In a recent kitchen remodel, we combined polished concrete floors with reclaimed wood ceiling beams and a large island top. The contrast in textures added depth and interest to the space, creating a perfect balance between rustic and contemporary.
Wood and concrete pairing suggestions:
- Concrete countertops with reclaimed wood cabinet fronts
- Reclaimed wood floating shelves against a concrete accent wall
- Outdoor seating area with concrete pavers and reclaimed wood benches
How do I ensure that different materials work well together in a space?
To create a cohesive look when mixing materials:
- Choose a dominant material and use others as accents
- Maintain a consistent color palette
- Balance textures (rough with smooth, matte with glossy)
- Consider the overall style of the space and how each material contributes to it
- Use repetition to create a sense of unity throughout the room
Finishing Techniques for Reclaimed Wood: Preserving Character While Enhancing Beauty
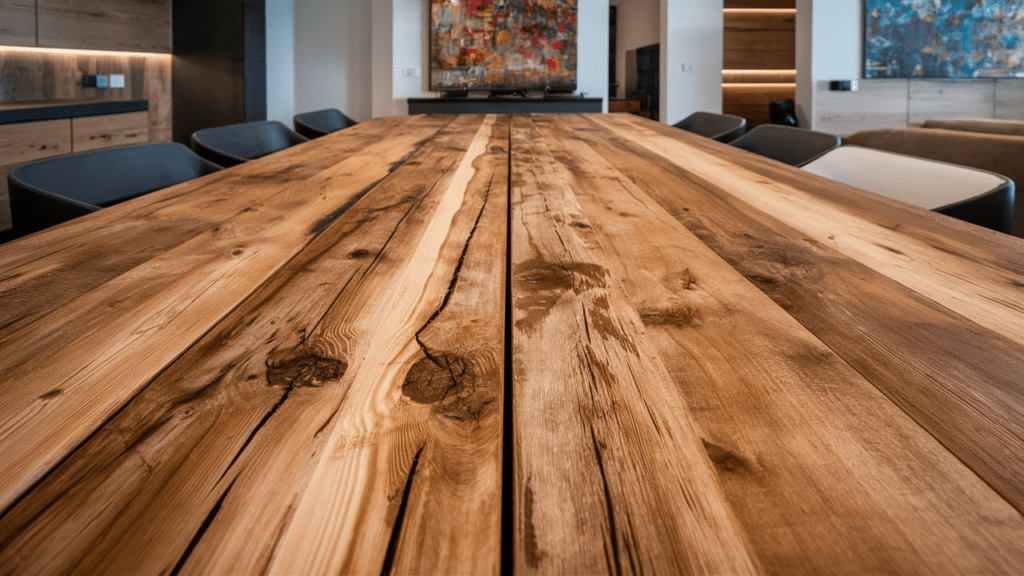

The finish you choose for your reclaimed wood can dramatically impact its appearance and longevity. As a designer, I always consider the wood’s natural beauty and the desired aesthetic of the space when selecting a finishing technique. Here are some popular finishing techniques:
1. Weathered and Distressed Looks
For those who love the authentic, aged appearance of reclaimed wood, minimal finishing is often the way to go. Light sanding to remove any loose fibers, followed by a clear, matte sealant, can protect the wood while maintaining its weathered charm.
In a recent beach house project, we left the reclaimed wood ceiling beams in their natural state, simply cleaning them and applying a clear, water-based polyurethane. The result was a space that felt instantly lived-in and relaxed.
2. Smooth and Polished Finishes
For a more refined look, reclaimed wood can be sanded smooth and finished to a high sheen. This technique works particularly well for furniture pieces or in more formal spaces.
I recently designed a dining room where we used reclaimed oak for the tabletop. We sanded it thoroughly, applied a rich walnut stain, and finished it with multiple coats of high-gloss polyurethane. The result was a piece that highlighted the wood’s beautiful grain while providing a durable, easy-to-clean surface.
3. Colored Stains and Washes
Sometimes, a pop of color is just what a space needs. Colored stains and washes can add visual interest while still allowing the wood’s natural grain to show through.
For a children’s playroom, we recently used reclaimed wood to create built-in storage units. We applied a whitewash technique to brighten the space while still maintaining the wood’s character. The result was a fresh, beachy look that complemented the room’s coastal theme.
Steps for applying a whitewash finish:
- Sand the wood to your desired smoothness
- Mix one part white latex paint with one part water
- Apply the mixture to the wood with a brush, working in the direction of the grain
- Wipe off excess with a clean cloth for a more translucent look
- Allow to dry completely and seal with a clear, water-based polyurethane for protection
Can I paint reclaimed wood, or will that ruin its character?
While painting reclaimed wood can cover up some of its natural character, it doesn’t necessarily ruin it. If you choose to paint, the texture and imperfections of the wood will still be visible, adding depth to the painted surface.
Consider using painting techniques like dry brushing or color washing to allow some of the wood’s natural beauty to show through. Ultimately, the decision to paint should be based on your personal style and the overall design of your space.
Maintaining Reclaimed Wood Decor: Preserving Beauty for Years to Come
Proper maintenance is key to ensuring your reclaimed wood pieces remain beautiful for years to come. As someone who has worked with reclaimed wood for over a decade, I’ve developed some tried-and-true methods for keeping these unique pieces in top condition.

1. Regular Cleaning Methods
For day-to-day cleaning, a soft, dry cloth is often all you need to remove dust and debris. For more thorough cleaning, I recommend using a slightly damp cloth with a mild soap solution. Always remember to dry the wood immediately after cleaning to prevent water damage.
Pro tip: Avoid using harsh chemical cleaners or abrasive materials, as these can damage the wood’s finish and patina.
2. Protecting Against Moisture and Sunlight
Two of the biggest enemies of wood are excess moisture and direct sunlight. To protect your reclaimed wood pieces:
- Use coasters under drinks and placemats under hot dishes
- Wipe up spills immediately
- Keep indoor humidity levels between 35-45%
- Use curtains or blinds to protect wood from direct sunlight
- Consider applying UV-resistant finishes to outdoor pieces
I once had a client who placed a beautiful reclaimed wood console table directly in front of a large window. Within months, the sun had faded and dried out one side of the table. We ended up having to refinish the piece and rearrange the room to protect it from further damage.
3. Refinishing Tips
Over time, your reclaimed wood pieces may need refinishing. Here’s how to approach it:
- Clean the surface thoroughly and allow it to dry completely
- Lightly sand the surface to remove any rough spots or minor damage
- Apply a new coat of finish, matching the original as closely as possible
- For heavily damaged pieces, consider seeking professional help
Remember, part of the charm of reclaimed wood is its lived-in look. Don’t be too quick to refinish every little scratch or dent – these imperfections often add to the wood’s character and story.
How often should I re-seal my reclaimed wood pieces?
The frequency of re-sealing depends on the piece’s use and location. As a general rule:
- Indoor furniture: Every 3-5 years
- High-use surfaces (like tabletops): Every 1-2 years
- Outdoor pieces: Annually
- Decorative items with minimal handling: Every 5-7 years
Always check your pieces regularly for signs of wear on the finish, and re-seal as needed to protect the wood.
Sustainable Practices in Reclaimed Wood Decor: Making Eco-Friendly Choices
As an interior designer, I’m passionate about creating beautiful spaces that are also environmentally responsible. Using reclaimed wood is inherently sustainable, but there are ways to take your eco-friendly efforts even further.

1. Certifications to Look For
When sourcing reclaimed wood, look for certifications that ensure the wood has been responsibly salvaged and processed. Some reputable certifications include:
- FSC Recycled: Ensures the wood comes from reclaimed or recycled sources
- LEED Credits: Using reclaimed wood can contribute to LEED certification for buildings
- Rainforest Alliance Certification: Indicates sustainable forestry practices
2. Supporting Local Artisans and Small Businesses
Choosing to work with local artisans and small businesses not only supports your community but often results in unique, high-quality pieces with a smaller carbon footprint.
I recently collaborated with a local woodworker on a client’s custom reclaimed wood dining table. Not only did we create a stunning centerpiece for the home, but we also supported a local craftsman and reduced transportation emissions by sourcing locally.
3. Upcycling vs. Buying New Reclaimed Wood Products
While buying new products made from reclaimed wood is a great option, don’t overlook the potential of upcycling existing pieces. I once helped a client transform an old wooden ladder into a unique bookshelf, and another time we repurposed a client’s great-grandmother’s hope chest into a stylish coffee table.
Ideas for upcycling with reclaimed wood:
- Turn old wooden doors into headboards
- Repurpose wooden pallets into outdoor furniture
- Create wall art from reclaimed wood scraps
Is using reclaimed wood always more environmentally friendly than new wood?
While reclaimed wood is generally more eco-friendly, it’s important to consider factors like transportation distance and processing methods. In some cases, locally sourced new wood from sustainably managed forests might have a lower overall environmental impact than reclaimed wood transported long distances. Always consider the full lifecycle of the product when making your decision.
Incorporating Reclaimed Wood in Small Spaces: Maximizing Impact in Minimal Square Footage
As a designer, I often work with clients who love the look of reclaimed wood but worry about incorporating it into smaller spaces. The good news is that with some creative thinking, you can enjoy the warmth and character of reclaimed wood even in the coziest of homes.

1. Space-Saving Ideas for Apartments
In compact living areas, multi-functional pieces are key. I recently designed a studio apartment where we used a reclaimed wood Murphy bed with built-in shelving. During the day, it served as a beautiful wood accent wall with storage, and at night, it transformed into a cozy sleeping area.
Other space-saving ideas include:
- Fold-down reclaimed wood desks or dining tables
- Sliding barn doors as room dividers
- Floating reclaimed wood nightstands
2. Dual-Purpose Reclaimed Wood Furniture
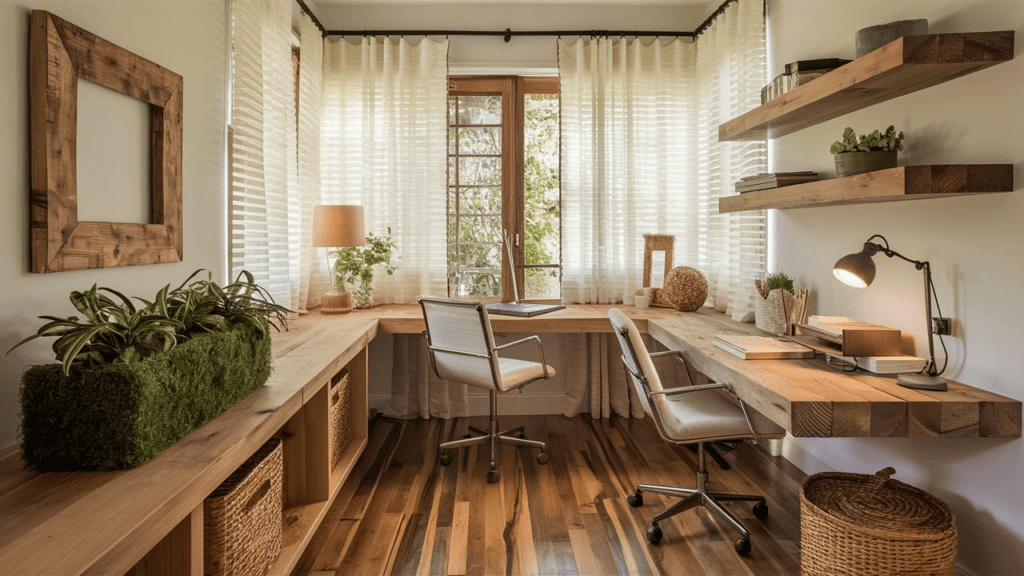
Pieces that serve multiple functions are perfect for small spaces. In a recent tiny home project, we created a reclaimed wood kitchen island that doubled as a dining table and workspace. The weathered wood added warmth to the space while maximizing functionality.
More dual-purpose ideas:
- Ottoman with hidden storage
- A coffee table that converts to a desk
- Bench seating with built-in storage
3. Creating the Illusion of More Space with Reclaimed Wood
Believe it or not, reclaimed wood can actually make a space feel larger. In a narrow hallway, we once installed reclaimed wood planks horizontally along one wall. The long lines drew the eye down the hallway, making it feel more spacious.
Other tricks to visually expand space:
- Use lighter-colored reclaimed wood to brighten a room
- Install reclaimed wood flooring diagonally to create the illusion of width
- Create a reclaimed wood accent wall to add depth to a room
Won’t using reclaimed wood make my small space feel cramped?
Not necessarily! The key is in how you use it. Opt for lighter finishes, use wood strategically as accents rather than overwhelming the space, and balance it with other materials. When used thoughtfully, reclaimed wood can add warmth and character without making a space feel smaller.
Reclaimed Wood in Outdoor Spaces: Bringing Natural Beauty to Your Exterior
Extending the use of reclaimed wood to outdoor spaces can create a seamless flow between your interior and exterior design. However, using wood outdoors comes with its own set of challenges and considerations.
1. Weather-Resistant Finishes for Exterior Use
When using reclaimed wood outdoors, proper sealing is crucial. I always recommend using marine-grade sealants or exterior-grade polyurethane for maximum protection against the elements.
In a recent project, we created a stunning outdoor dining table from reclaimed dock wood. We treated it with a UV-resistant, water-repellent finish to ensure it could withstand sun, rain, and temperature fluctuations.
2. Garden Features and Landscaping Ideas
Reclaimed wood can add a touch of rustic charm to your outdoor spaces. Some ideas include:
- Raised garden beds made from reclaimed timber
- Pathway edging using reclaimed wood planks
- A vertical herb garden created from a reclaimed wood pallet
For a client with a large backyard, we recently designed a reclaimed wood archway covered in climbing roses. It became a beautiful focal point and added a sense of romance to the garden.
3. Outdoor Furniture and Structures
Reclaimed wood is perfect for creating durable, character-filled outdoor furniture and structures. Some popular options include:
- Adirondack chairs made from reclaimed barn wood
- A pergola constructed with reclaimed beams
- A rustic outdoor kitchen with reclaimed wood cabinetry
One of my favorite projects involved creating a cozy fire pit area using reclaimed wood for built-in seating. The weathered wood blended beautifully with the natural surroundings, creating an inviting outdoor living space.
How long will reclaimed wood last outdoors?
With proper treatment and maintenance, reclaimed wood can last many years outdoors. The key is to choose naturally durable wood species (like cedar or teak), apply appropriate weather-resistant finishes, and perform regular maintenance. Expect to refinish outdoor pieces every 1-2 years, depending on your climate and the wood’s exposure to the elements.
Conclusion
Incorporating reclaimed wood into your home decor is not just a design choice – it’s a way to bring history, character, and sustainability into your living spaces. From accent walls to outdoor structures, the possibilities are endless.
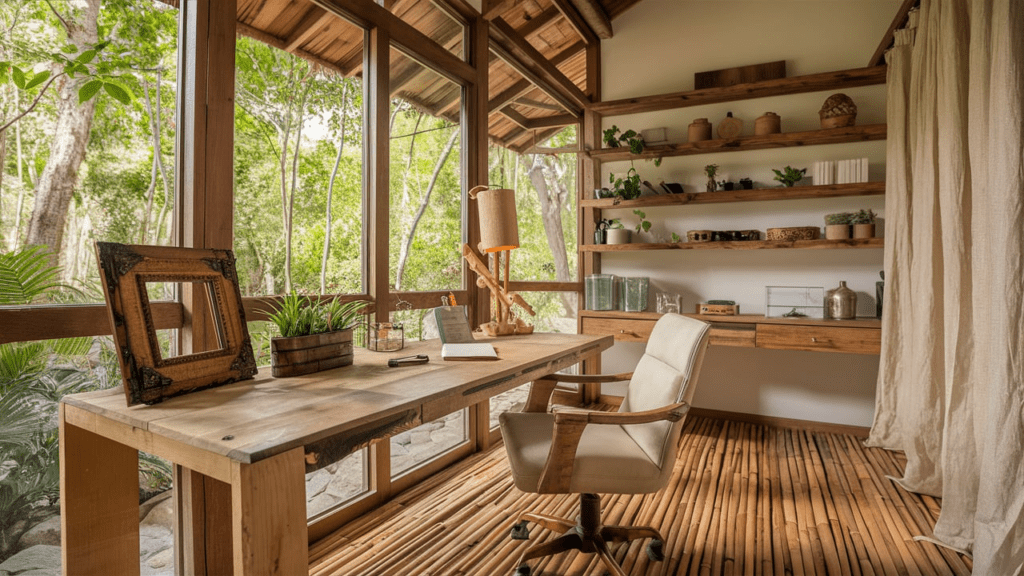

As you embark on your own reclaimed wood projects, remember that each piece tells a unique story. Embrace the imperfections, get creative with your applications, and most importantly, enjoy the process of bringing new life to these beautiful old materials.
Whether you’re a seasoned DIY enthusiast or just starting to explore the world of reclaimed wood, I hope this guide has inspired you to look at old wood in a new light. Happy decorating!


